Thursday, August 29, 2013

Going blonde: The Emotional Process

Were you born with beautiful blonde hair? Ugh, me neither. And it's not fair! Which is why it's so nice that, thanks to the miracles of modern technology (also known as "a buttload of bleach and a couple hours of spare time"), the piddling whims of nature need not stop any of us from having the hair of our collective dreams. Dream big, brownies! DREAM BIG.

For the observant reader, this wont be a huge shock, as I have been posting many blonde related posts!

But yes, I have finally taken the plunge into blonde. However it was not an easy process, mentally or physically! For best results, you must first familiarize yourself with the all-important emotional process of Bottle Blonding.

Standard before shot 

STAGE ONE: ASPIRATION
Begin to imagine yourself as a blonde. Upload your photo to a virtual makeover site to see what you'd look like with blonde hair. Casually introduce the idea of blondness in conversations with your friends, using such ice-breaking statements as, "Do you think blondes really have more fun?" and, "If golden retrievers were people, they would be SO PRETTY."

STAGE TWO: DELUSION
Begin to have vivid dreams about salon visits and hair dye. Wake up convinced that you've already taken the plunge. Feel strangely distressed when you wander past the bathroom mirror and realize that it wasn't real.

STAGE THREE: INTENT
Make the appointment. State your intentions to the receptionist. Make a small but audible shrieking noise when she informs you that the process can take up to four hours and/or two processes!

STAGE FOUR: RESEARCH
Read articles about the different types of blondes. Take magazine quizzes with titles such as "So you wanna go blonde!" and "What's your true hair identity?". Call your mother in the middle of the night to ask whether your skin has red or blue undertones; when she tells you she doesn't know, accuse her of never really loving you.

STAGE FIVE: DOUBT
It's not too late to back out, you know. What's so bad about your current hair color, anyway? Who the hell do you think you are, messing with nature like this?! What's next, BUTT IMPLANTS?!!! You should be ashamed of yourself.

STAGE SIX: ACTION
Arrive at the salon. Nod mutely when the stylist says, "So, I hear we're going blonde!" Pick your desired shade from a color wheel made of disembodied hair. Watch in saucer-eyed silence as the world's stinkiest mixture is applied to your head with a miniature paintbrush.

STAGE SEVEN: DOUBT, REVISITED
It's not too late to back out, you... wait, no, it is. Your hair is already changing color. OHMIGOD, YOUR HAIR IS ALREADY CHANGING COLOR.

STAGE EIGHT: FIRST LOOK
Behold your new hair after the first treatment. Try to picture what it'll look like when it's not slicked back and soaking wet. Decide that it is not necessarily bad, but is definitely not the desired shade of blonde and book your next appointment in 4 weeks time. 

Standard in-between shot 


STAGE NINE: REPETE 
Repete stages 1-9 with less doubt now because, hell, you have already paid a shit-ton for your current hair, there is no way you are going back now!

STAGE TEN: CONFIDENCE
Stride back into the salon like you are on a mission, you are going to go blonde if it kills you! 

STAGE ELEVEN
As you watch the foils swell up and see you hair change colour, realise the gravity of what you are doing. Think back at how foolish you have been, strutting in there without a care in the world. Sit there wishing you had taken advantage of the time you had to reconsider your choices. 

STAGE TEN: YOU ARE BLONDE
You did it! Go home! Take pictures! Enjoy the squeals of delight from everyone you know when they see you for the first time! And whatever you do, do not stop to think about how hard it is to tell the difference between squeals of delight and shrieks of horror! Oh, and of course, post pictures on the internet so that everyone can tell you whether they hate it or not.


SHARE:

Sunday, August 25, 2013

5 easy ways to remove acne scars naturally


I have generally got very good skin however when it gets slightly (w)hormonal, it all goes to hell. Because of this I have gained a significant red scaring on my face, which I have been become very good at hiding with make up. But I figured why not fix them before they begin, So if your acne scarring isn't very deep I think the 5 methods that, at one time or another, worked for me, may work for you. I used the following 5 easy to use home remedies to diminish and eventually remove my acne scars permanently.
1. Egg whites - Egg whites have very powerful healing qualities that will help heal your scarring and eventually make it less visible. Egg white is full of proteins and amino acids which can tighten the pores to prevent new breakouts while it lightens the scarred skin. Take a small bowl and whip 3 egg whites until they become fluffy and white. Use your fingers to gently spread the egg whites on to your skin - concentrate on the problem areas. Let the egg whites dry on the skin and wait a few minutes before rinsing away gently with moderately warm water. Do this 2-3 times a week.

2. Baking soda - Baking soda is coarse but not that coarse, its small particles are smooth and would not damage the skin. And if applied correctly it will gently slough off the top layer of dead skin cells without causing your sensitive facial skin to become irritated or inflamed. Simply mix a small amount of baking soda with water to make a consistent paste. Very gently massage the baking soda onto your skin and leave it on for one minute, before rinsing it off with lukewarm water. Remember to always moisturize your skin afterwards; I personally, massage a few drops of olive oil on my face and it works very well. Repeat this 2-3 times a week or depending on your exfoliation routine.
3. Lemon juice - Lemon juice contains citric acid which, along with lactic and glycolic acids, is one of the most commonly found Alpha Hydroxy Acids or AHAs. AHAs are very well known for their cosmetic usage. Many skin care products, including anti-aging creams and chemical peels, have AHAs in them as a key ingredient. Topical application of AHAs is said to induce an increased production of collagen and increased skin thickness. All of which equates to more healing for scarred skin. Additionally, lemon juice, due to it natural acidic content, is a powerful disinfectant which helps in destroying acne causing bacteria and it is a natural exfoliant which removes dead skins cells and facilitates the formation of new healthy skin. Furthermore, it helps in lightening the skin tone which helps in countering the effects of hyper-pigmentation - another souvenir of your acne days. As for the lemon juice remedy : Ensure that your skin is clean by washing it with a mild acne cleanser. Then take a bowl and squeeze 1-3 lemons in it or better yet buy an all natural lemon juice from your local grocery store. Take a cotton ball and dab it with the juice. Apply the juice to effected areas completely but don't overdo it. Repeat this 2-3 times a week. Remember if you have sensitive skin, the juice may induce a stinging effect, but it will likely happen only the first couple of times. If the stinging effect accompanies significant redness then discontinue usage because your skin is far too sensitive for this method. I have sensitive skin but it was bearable and the sensation did go away after the 3rd application..so its still a very workable solution for those with sensitive skins, but you need to listen to your skin's reaction before applying anything.


4. Aloe Vera juice - Aloe Vera juice or gel, is a fantastic way to remove acne scars. Not only does it soothe inflamed skin, it also boosts the immune system and regenerates damaged tissue. Its mild acerbic qualities ensures that with regular usage acne breakouts would be easily prevented resulting in a softer skin, decreased swelling and invigorating new cell growth and thereby reduced acne scars which eventually fade over time. Many in the cosmetic industry are recognizing the importance of this miracle plant and incorporating its extracts in many skin care products. You can buy such over the counter products but I would strongly recommend getting either fresh aloe vera gel or juice every time by growing an aloe vera plant in your very backyard (believe me it isn't a hassle) or buy it in its all natural form without an additives.

5. Olive Oil - Olive oil is packed with iron and vitamins A, D, E, C, B1 and B2. Vitamin E is increasingly being recognized as an important player in helping the fight against the aging process. Olive oil being rich in anti-oxidants and a good anti-inflammatory agent helps prevent acne and removes acne scars effectively. Because olive oil is non-comedogenic i.e it doesn't clog pores, and because it effectively dissolves dirt and oil trapped within our already clogged pores; it is a good acne scar treatment. Before going to bed gently massage olive oil onto your facial skin, concentrating on the trouble spots. Continue massaging for a few minutes till you can feel that your pores are completely saturated. Drape a warm wash cloth over your face to steam and hence open the pores. Gently wipe away the excess oil. Repeat the process 1-2 times before rinsing your face with cold water. Apply a very thin layer of olive oil on your face and leave it on for at least 15 minutes before going to bed.

I'm not a skin specialist of any kind and I can't come up with any scientific evidence to back these claims up. The 5 easy ways to remove acne scars, are 5 easy methods that, I and a few of my friends tried to reduce our acne problem and significantly diminish acne scars. Having said that, you have to realize that natural skin care methods come without any significant side-effects and are kind to your skin but the drawback is that like most natural remedies, its going to take time in fading your acne scars. If your apprehensive in applying harsh chemicals to your skin as found in many commercial cosmetic products, then I suggest that you persevere with any one of these methods. 
Good luck in getting a clear, glowing, acne and acne scar free skin.
SHARE:

Monday, August 19, 2013

Update: We Moved!

Not only have we moved, we also have internet! So you can expect normal posting schedule. We used to live in South Sydney, now we live in a little country town an hour South of where we originally from.

Now that we are renting ( well, work is renting for us) I have finally allowed my internal desire to do some interior design run wild. So I have taken some photos of the house to show you what I have been working on the past few weeks and show you where we are living!


Those are my favorite rooms ( and also the ones with furnture) We also have a study but that is almost completely filled with boxes from Daniels work, A laundry ( which is also filled with empty boxes for when we move again in 6 months time) and two upstairs bedrooms which are completely empty except for the air beds. As you can see, none of the above was worth photographing.

Just for good fun, I included a photo from when our friends came down this weekend to see our new place. I call it "Mexican Maddness"


I am exciting to get back into blogging and filming for you guys soon. I have a very exciting post coming up next Saturday.


SHARE:

Saturday, August 17, 2013

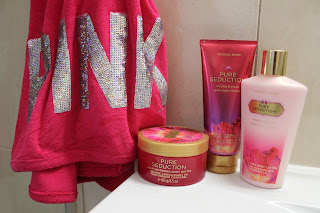
Fashion Haul: Victorias Secret

I spent way too much money in Victorias Secret while in the US


SHARE:

Thursday, August 15, 2013

Fashion Haul: USA Edition

This is all the things I picked up while honeymooning in the US


SHARE:

Tuesday, August 13, 2013

Behind the Blog: Our wedding!


Here is the highly anticipated wedding video footage edited together. I hope you guys Enjoy!


SHARE:

Saturday, August 10, 2013

June Beauty Favourites

So I know I have been MIA the last few weeks, but the exciting news is that we moved! The not so exciting news is that we have no internet! We are still struggling to get it up and running but till then I have organsied some posts to go out that are videos from my Youtube Channel that I have no shared here before. So sorry for the half ass posts but I promise you, I have big things planned for when I get everything together. 

Till then, here is a delayed monthly favourites! 


SHARE:

The New Naked?


I'm totally in love with this new 'Fade In' palette from Smashbox's 'Fade to Black' collection. 
While I adore my Urban Decay Naked and Naked 2 palettes, I have used them to death over the past year or so, so this makes a new but very welcome option in my neutral eye wardrobe...


It contains four mattes and three beautiful shimmers. As you'll notice in the pictures, the darker shades show up slightly darker than they appear in the pan, but are all beautiful. 
The formula and pigmentation of these are all really nice. I would note that the black with a tiny bit of shimmer in it is slightly less pigmented than the others, and took a little work to get the finish shown above. The addition of a gorgeous, shimmery olive green also makes this palette stand out from many others.
Apart from that, the formulas are lovely, they blend well and the staying power is really nice.
The packaging is stunning too and I think this is going to be my go-to-palette for the next few months. There is also another colour-way in this palette which contains more plummy, purple shades. They are already available in Sephora in the USA, priced at $42, but if you're UK/AU based they will be available online and on counters at the end of August, priced at £32. 

Value for money isn't quite on a par with the Urban Decay options (if you don't already own a Naked palette, I would definitely recommend getting one over this, but if you are stuck in a neutral-eye-rut with your Naked palettes and are looking for something new in a similar vein, this is my recommendation.
SHARE:
© Yvette Barnett. All rights reserved.
Blogger Template Made By pipdig