Sunday, September 15, 2013

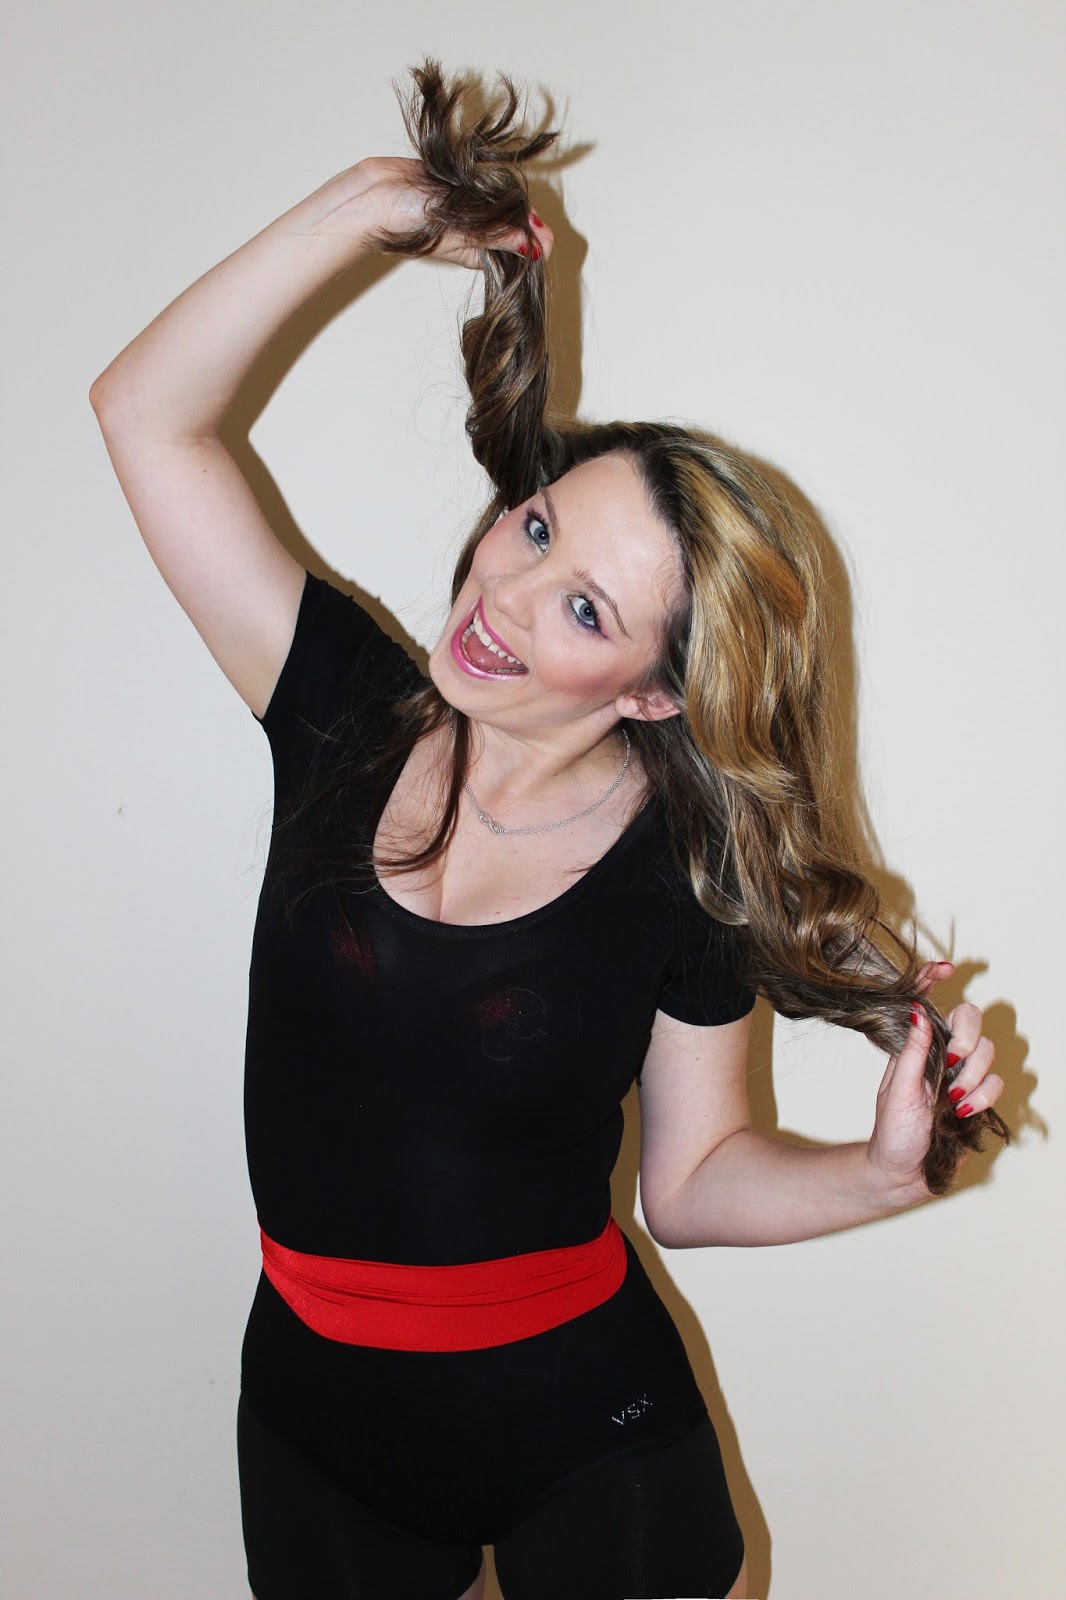
Retro Rainbow Make up


So on Saturday night I attended an 80's themed party. However when it came to my make up, I knew it would have to be bright! But all the colours I was thinking of (Purple, blue and green) clashed with my black and red outfit. So, if I was gonna clash, go big or go home. Bring on all the colours!!!


I paired it with a candy pink lipstick to make the whole face pop and not to take away from the eye shadow.


For those of you who will say that my outfit is not 80's because it does not have enough colour, this outfit is actually my Mum's from the 80's, when she would hit up the gym. You cant get more 80's then that!

 ( This photo is more yellow because it was taken at sunset, not because it was edited) 

SHARE:

Thursday, August 29, 2013

Going blonde: The Emotional Process

Were you born with beautiful blonde hair? Ugh, me neither. And it's not fair! Which is why it's so nice that, thanks to the miracles of modern technology (also known as "a buttload of bleach and a couple hours of spare time"), the piddling whims of nature need not stop any of us from having the hair of our collective dreams. Dream big, brownies! DREAM BIG.

For the observant reader, this wont be a huge shock, as I have been posting many blonde related posts!

But yes, I have finally taken the plunge into blonde. However it was not an easy process, mentally or physically! For best results, you must first familiarize yourself with the all-important emotional process of Bottle Blonding.

Standard before shot 

STAGE ONE: ASPIRATION
Begin to imagine yourself as a blonde. Upload your photo to a virtual makeover site to see what you'd look like with blonde hair. Casually introduce the idea of blondness in conversations with your friends, using such ice-breaking statements as, "Do you think blondes really have more fun?" and, "If golden retrievers were people, they would be SO PRETTY."

STAGE TWO: DELUSION
Begin to have vivid dreams about salon visits and hair dye. Wake up convinced that you've already taken the plunge. Feel strangely distressed when you wander past the bathroom mirror and realize that it wasn't real.

STAGE THREE: INTENT
Make the appointment. State your intentions to the receptionist. Make a small but audible shrieking noise when she informs you that the process can take up to four hours and/or two processes!

STAGE FOUR: RESEARCH
Read articles about the different types of blondes. Take magazine quizzes with titles such as "So you wanna go blonde!" and "What's your true hair identity?". Call your mother in the middle of the night to ask whether your skin has red or blue undertones; when she tells you she doesn't know, accuse her of never really loving you.

STAGE FIVE: DOUBT
It's not too late to back out, you know. What's so bad about your current hair color, anyway? Who the hell do you think you are, messing with nature like this?! What's next, BUTT IMPLANTS?!!! You should be ashamed of yourself.

STAGE SIX: ACTION
Arrive at the salon. Nod mutely when the stylist says, "So, I hear we're going blonde!" Pick your desired shade from a color wheel made of disembodied hair. Watch in saucer-eyed silence as the world's stinkiest mixture is applied to your head with a miniature paintbrush.

STAGE SEVEN: DOUBT, REVISITED
It's not too late to back out, you... wait, no, it is. Your hair is already changing color. OHMIGOD, YOUR HAIR IS ALREADY CHANGING COLOR.

STAGE EIGHT: FIRST LOOK
Behold your new hair after the first treatment. Try to picture what it'll look like when it's not slicked back and soaking wet. Decide that it is not necessarily bad, but is definitely not the desired shade of blonde and book your next appointment in 4 weeks time. 

Standard in-between shot 


STAGE NINE: REPETE 
Repete stages 1-9 with less doubt now because, hell, you have already paid a shit-ton for your current hair, there is no way you are going back now!

STAGE TEN: CONFIDENCE
Stride back into the salon like you are on a mission, you are going to go blonde if it kills you! 

STAGE ELEVEN
As you watch the foils swell up and see you hair change colour, realise the gravity of what you are doing. Think back at how foolish you have been, strutting in there without a care in the world. Sit there wishing you had taken advantage of the time you had to reconsider your choices. 

STAGE TEN: YOU ARE BLONDE
You did it! Go home! Take pictures! Enjoy the squeals of delight from everyone you know when they see you for the first time! And whatever you do, do not stop to think about how hard it is to tell the difference between squeals of delight and shrieks of horror! Oh, and of course, post pictures on the internet so that everyone can tell you whether they hate it or not.


SHARE:

Sunday, July 21, 2013

Blonde and Blonder: Picking the right shade


Sorry about the delay in posts for the last few weeks, I have had a lot going on that I will soon be able to tell you about, don't worry, it's all good things! 

On to todays post. With it being the middle of summer for those of you north of the equator and the tale end of winter for us south of the boarder, the biggest hair trend that is happening right now is blonde, blonde highlights and blonde tips (otherwise known as ombre). Because of this, I decided to do a new blogging series called 'blonde and blonder' going over all the different aspects of being blonde, what to consider and how to care for it etc. To kick start this series, I should focus on picking the right shade.

First thing you need to consider is your skin-tone.


According to Ludovic Audesson, senior colorist at in New York City, choosing the right blonde tone goes hand-in-hand with your skin-tone. Here are his recommendations:

Blonde hair color for light skin-tonesOpt for a golden, strawberry or light blonde. Warming up your hair with highlights can add some color and interest to your locks and your face. But because you are fairer skinned, stay away from shades that are white, ash and reddish.

Blonde hair color for medium skintonesBecause your skin has more color to it, you can add more color to your hair. A golden hue is beautiful, as is a beige-blonde or even a light blonde. Just be sure to maintain some warmer tones to match your skin. Ashy or orange-based tones will make you look washed out.

Blonde hair color for dark skintonesStick with darker blonde shades on your hair. Remember, you don’t want to move more than two shades from your natural hair color, so if you have dark skin, chances are your hair is naturally darker too. Caramel or golden highlights can be beautiful. You should avoid tones with too much white, platinum or orange because these will look unnatural with your darker skin-tone.

Next, consider your natural hair colour. 

On a scale of one to 10 with one being the darkest possible hair colour and 10 being the palest, if you’re born a natural blonde, you are a level six (dark blonde) to a level 10 (platinum blonde). If you want to change your hair color or add highlights, stick with this basic rule of thumb: Don’t go more than two levels—or shades, above or below your natural color.
Jon Furniss/WireImageReese Witherspoon

For example, a level six can go darker or lighter—to a four or an eight—because this is the most versatile shade. Levels seven to eight have the perfect scenario to add highlights or lowlights and become more of a golden, strawberry or pale blonde. If you’re a nine to 10, meaning a very light blonde, you shouldn’t use an all-over color because you don’t want to contrast your natural tones with anything too dark. If you choose to do anything, add lowlights for dimension and contrast.

Celebrities with blonde hair

When choosing the perfect blonde shade for your skintone, take your inspiration from the celebrities who do it right. Sharon Stone and Reese Witherspoon are both examples of women with fair skin who look amazing with their lighter locks. Jennifer Aniston is someone with medium skintones who pulls off her “bronde” (blonde-brunette) hue perfectly, and while Kim Kardashian has a darker skintone, her caramel highlights add a lot of depth to her long mane.


“Hair color is a mixture of colors,” said Van Gogh. “The darker the blonde to begin with, the more a dye will look toned down. But the lighter or whiter the blonde, the more vibrant the dye will become, so you have to be careful when choosing a shade.”

Another thing to consider when going blonde is your lifestyle, according to Ludovic. “Do you live somewhere warm where the sun is going to affect your hair color? Will you be going in the ocean or pool a lot while maintaining your color?” Those are factors that can change the tone of your hair to a less desirable shade that may no longer work with your skin.

“Being blonde can take 20 years off you and soften your face,” added Ludovic. “Consistent with the cliché, the risk is that sometimes blondes are not taken seriously, but if you pay careful attention to getting the right shade and tone, it can be powerful.”

Blonde hair can be great for summer, but make sure you get it done professionally because I do not what to be responsible when you burn all your hair off with bleach! But, as a former blonde myself, I have it on good authority that blondes do in fact have more fun so go blonde and have a great summer!!
SHARE:

Thursday, July 11, 2013

How to dress for your body shape: Rectangle


It's easy to make women's dress more flattering by paying attention to the woman's figure. If you have a rectangle shape, one with no curves, you can make your dress habits flatter your figure by making the right clothing choices.

  • Ladies dress items like dresses, dress pants and dressy blouses can all be worn in a way that flatters a rectangle figure. The object is to create the illusion that you have larger hips than you waist and larger breasts than you do. This can be done by the cut and the color of the dress items that you choose.

  • Look for items that are tailored at the waist. The shirt, jacket or dress should nip in at the waist to create the illusion that it's your figure that has the waist. The cut of the outfit should also emphasize the bust line. A shirt or dress with an empire waist will make the bust look larger and therefore the figure curvier.

  • Choose brighter colors at the bust line to break up your figure and make your bust look larger. Many shirts and dresses feature extra color or styling at the top. These can help you to instantly look curvier and less like a rectangle.

What to wear?Tapered Shirts

Choose shirts that taper in at the waist instead of shirts that are loose fitting in this area. The reason for this is that the loose-fitting shirt will hide your curves and make you look rectangular or "boxy." This is the opposite of what you want to do. By choosing a shirt that tapers in at the waist, you are using your shirt to create curves. Choose shirts that have lower neckline, as opposed to the high necklines. You can also choose shirts that have decorations around the neckline to add visual interest to the neck area.
Flared or Straight-Legged Pants

Flared or Straight-Legged Pants

Wear pants that give you shape or pants that highlight the shape you already have. For example, instead of choosing a tapered pant that will cling to your rectangular shape, choose flared or straight-legged pants. By wearing a flared or straight-legged pant, you are adding shape and definition to your lower body, from the hips all the way down to your ankles.A-Line Skirts


A-Line Skirts

Stay away from straight-line skirts, since these straight lines will cause you to look rectangular. Instead, wear A-line skirts. The A-line skirt literally flares out like the shape or the letter "A." The A-line skirt will give the appearance of shape to your lower body. Try to wear skirts that stop just above or at the knees. This will allow the curvature of your calves to show.
Tapered Jackets


Tapered Jackets

Wear a jacket that tapers in at the waist. For the length of the jacket, it should stop right below the waist. If you wear a jacket that is longer, you run the risk of the jacket covering up the curves of your hips, thus giving you a rectangular shape.

Celebrities with a rectangle body type:  
Cameron Diaz, Hilary duff, Nicole Kidman and Britney Spears 

SHARE:

Tuesday, June 4, 2013

Revlon Photo Ready Perfecting Primer Review


Face primers were perviously only a high end product that were exclusive for Celebrities and for wedding. However Revlon saw this as an oppurtiny and released the first drugstore primer. The Revlon Photo Ready Perfecting Primer was something i have had my eye on for a while, but its price (A$40!) had deterred me. Luckily, Priceline were having a 40% of sale and i finally caved.

The packaging is good, easy to use pump, its feels like quality as it is made out of glass. The design on the jar is quite minimalistic which seems to be going for a high end look. I like that the packet is clear, an easy indication of how much is left.

When you pump it out, it is a white colour. Once you rub it into you skin it goes clear. It is very light on the skin, not at all heavy and allows your actual make up to glide on quite smooth. So far i was very impressed. However with primers it is not just how it feels and looks, it is how it preforms!

This photo below was taken just before i attended a friends graduation. This was a prime (see what i did there?!) time to test this primer out because underneath this make up is the worst my skin has ever been, and I was sick with the flu. Definitely putting it to the test!


The photo below was take about 8 hours after the first one. During my time out i had food and drink and keeping in mind i was sick, so constantly touching my face, I was very impressed by the performance. I never did any make up touch ups while out. The only drastically worn off make up product is my eye liner on my bottom lash-line, which is more than likely attributed to my eyes constantly watering. I think under normal circumstances this product would be amazing, especially considering it is a drug store brand.

( Apologies for this photo being taken on the train, it just happened to have better lighting then my house!)

Overall I am very happy that i finally caved and purchased this product. I think i will probably repurchase it in the future, however considering the price i would only use it sparingly, for special occasions.
SHARE:

Wednesday, May 29, 2013

How to dress for your body shape: Inverted Triangle


Inverted triangle body types have a large upper half of the body and a slim lower half. They are characterized by large busts, large shoulders, wider, undefined waists, small hips and thin legs. Inverted triangles should try to accentuate their small hips and legs while drawing attention away from their large chest and shoulders.
  • Choose bottoms that flare to balance out the larger upper half of the body. Skirts and pants with a flare add the illusion of size.
  • Pick tops that show off thin arms to flatter this body type. Sleeveless tops and flutter sleeve tops accomplish this goal.
  • Wear darker colors on top and lighter colors on the bottom. This minimizes the top half. Lighter colors also create the illusion of a larger bottom half, and creates proportion.
  • Buy tops that cover the hip area. This hides the wider waist that inverted triangle body types have. It also draws the attention towards the shapely and slim legs associated with an inverted triangle body type.
  • Try tops that have less detail. Details draw attention to the top, and will make an inverted triangle's top even more noticeable.
  • Wear shirts with large straps. Anything strapless or with thin straps will draw attention to wide shoulders. Sleeveless tops are flattering if they don't make the shoulders appear more broad with thin straps.


Play down the top:
Tops should draw attention downward away from the shoulders.

V neck, wrap style and vertical lines in the bodice all draw attention downward.

Jackets should be narrow at the shoulders and widest at the hips.

Wear Tailored shirts and jackets.

Wear dark colored tops.

Vertical lines created with accessories will draw the attention downward

Monochromatic colors in draped styles will lengthen the body.


Play up the bottom:
Wear a belt, it will accent your waist
Choose bottoms that enhance and flatter your lower body.

Strong visual details below the waist will draw the attention downward.

Wear pants with pockets and embellishment.

Wear wide leg or boot cut pants.

Wear a full or A-line skirt.

Wear horizontal lines on the bottom half.

Add volume with thicker fabrics on the bottom with fabrics like knit, wool or tweed.

Show off those great legs with a great pair of pumps.

Stay away from shoes with straps, they will shorten your legs.


SHARE:

How to dress for your body shape: Apple


If you have an apple-shaped body, then your body is "top heavy," meaning you have a wide torso, broad shoulders, and a full bust, waist, and upper back. Apple-shaped bodied women also tend to have thinner arms, legs, and hips, and tend to gain weight at their waistlines. If you have an apple shaped-body, then you should be proud of your full figure and get ready to flaunt it. But if you want to show off what you've got, you need to dress appropriately. If you want to know how to reallydress to flatter your apple-shaped body, then keep reading!


Draw attention away from your middle. To dress your apple-shaped body, you'll want to take attention away from your middle, since it's already full. To draw attention away from your middle, avoid low shorts or pants, high-cut shirts, or any fabric length that cuts off below or above your middle. You'll want to distract people from your middle by directing their attention elsewhere or by creating more definition in your waistline.
You should also avoid wearing an outfit with a different pattern in the belly area. This will draw more attention to your belly.

Avoid wearing thick belts, which will draw more attention to your middle.

Avoid clingy shirts or dresses, which will also draw attention to your middle.


Emphasize your bust. If you have an apple-shaped body, then you must have a great bust, so don't be afraid to flaunt it. Showing off your bust will not only emphasize one of your most amazing features, but it will also take attention away from your middle. To emphasize your bust, you should wear v-necks, plunging necklines, or A-line dresses, to lengthen your body and draw attention to your bust.
Wear shirts or dresses that flow from under your bust, expanding at the waist.

Remember that drawing attention to your bust is different from looking top-heavy. You don't need to wear elaborate necklaces or tops with ornate patterns near the neck. You already have a great bust, so it needs no adornments.


Show off your legs. A great pair of legs often comes with the apple-shaped body. So, whether you're tall or on the shorter side, don't be afraid to show off your great legs. You can do this with a pair of short-shorts, or high heels that lengthen your body and balance out your bottom half.
Don't minimize your legs by wearing big heavy boots, leggings, or skinny jeans. This will only make your gorgeous legs look smaller.

Tops

Pay attention to the cut of your top. Whether you're wearing a top or a dress, there are a few rules for wearing a top that flatters your bust and draws attention from your waist line. Here are some types of tops to wear and some others to look out for:[2]
Wear: tops with v-necks, plunging necklines, strapless, scoop, or tops with narrow bodices. This will draw more attention to your bust and elongate your upper body.

Avoid: tops with a halter, very high necklines, decorated neckline, off-the shoulder cut, or boat neck. This will make your shoulders broader and will draw too much attention to your chest.

Pair your top with an appropriate jacket or coat. The right jacket can help camouflage your heavy midriff. You should wear a jacket that is single-breasted and doesn't have too many details. Wearing a structured jacket or coat will create curves in your chest and hips and will minimize your waist. Layering your top will help create balance for your figure. Here are some other things to try:
Tailored blazers and coats

Opened cardigans or waistcoats

A duster coat that ends above the knee

Bottoms

Wear the right pants. You'll need to show off your legs to balance out your apple-shape. Drawing attention to your legs will help add more balance to your look. Don't downplay your legs by wearing skinny jeans, leggings, or any other too-tight fabric. This will make your legs look even smaller and will make your waist look even larger as a result. Here are some other tricks to try when choosing a pair of pants for your bottom half
Avoid pants that have a lot of zippers in the front, or this will draw more attention to your middle. Try to find a pair of pants with zippers on the sides instead.

Wear pants with back pockets. This will create definition in your flatter bottom and will balance out your waist.

Wear pants that are denim, trouser cut, flared, wide-legs, or boot cut.

Wear the right skirt. A great skirt can help define your apple-shaped body. Try wearing a skirt that has a bias cut or an A-line, or flatter your figure with a full circle skirt. Avoid skirts that are tight around the waist or which fall at your natural waist. You can also wear a trumpet skirt or skirts with a hanky hem

WHICH CELEBRITIES HAVE A PEAR-SHAPED BODY?
Catherine Zeta-Jones, Liz Hurley and Drew Barrymore


SHARE:

Sunday, May 5, 2013

Maybelline Fit Me Review


The Maybelline Fit ME range of foundations came out about 6 months to a year ago and claims to make your skin flawless and lets the real you come through by matching your natural skin tone with a fresh, breathable, natural make up foundation.
To achieve this, the range consists of a foundation liquid base, a concealer and a powder.

The claims:
·         It's makeup that fits you.
·         No oils, no waxes, no nonsense
·         Natural coverage that leaves skin the way it was meant to be…fresh, breathing, natural  
·         Exclusive translucent base and lightweight pigments allow skin's natural highs and lows to show through
·         Non-comedogenic, dermatologist-tested


The packaging is ok. The concler package is what you would expect, however the label does rub off kind of easy. The liquid foundation packaging is good, it is glass, which is pretty good for the price and that is a drugstore brand. Finally. The powder, this was the packaging I was least impressed with. It is plastic and feels a little bit cheap, I do like that it has a hidden compartment for your sponge. However I HATE the sponge, I they are not very good quality and break after not much use.


I have been using this range for long time now. It is a little heavy because there are so much layers,  however it does give you quite good coverage when you use all three products together. The staying power is not great. I would recommend wearing a primer underneath your make up and taking the power pack when you go out, for touch ups.

                                          Before                                                                After


As you can see, this week was an ideal time to test the coverage of this foundation. I have accumulated my fair share ( and more) of spots and scars that needed a good covering! In the after photo, I am only wearing the Fit me range. I think it turned out quite effective!

Overall I think this is a really good foundation considering that is a drugstore brand. When used correctly it can give you a high end coverage. I would definitely re-purchase this brand. However, for more formal occasions I would opt for a more high end product. 

SHARE:

Friday, January 4, 2013

Make Up Artist Review: Rachel Elizabeth


So on the 3rd of Dec 2012 Daniel and i were having our engagement photoshoot, So i had my make up done by my wedding make up artist as a trial for the wedding day. I had it done by Rachel Elizabeth.

After graduating with a High Distinction from The Art and Technology of Makeup College Sydney, Rachel went on to work as a certified artist for M.A.C. This gave her the opportunity to transform countless faces of all ages and races. It also enabled her to work with the most esteemed Australian and International makeup artists through various Public Relations events and three consecutive Rosemount Australian Fashion Weeks.

As much as she loved the fashion world, Rachel always found weddings more fulfilling and rewarding.

Getting married recently herself and being bridesmaid three times all in extremely different weather, Rachel has had invaluable insight to what the bridal party (and their hair and makeup) go through on the big day.

Combining all of this experience, Rachel can guarantee that your makeup will look and feel comfortable, fresh and polished all day and through the night.

Before:                                                                          After: 


Overall i was very impressed with her. She listened to be and asked how i usually wore my make up and then we altered it to make it more wedding appropriate.

I felt i was able to learn a few techniques i would not have normally tried. She was very gentle, my eyes did not water much ( despite them watering if its too windy)

Overall i would definitely recommend her to anyone. She was amazing, i've had my fears about make up artists before, being to orange/ not being listened to, but she matched my skin perfectly.

Let me know what you guys think of my wedding make up!

Here is the video of the OOTD i did for the photo shoot.


Link to Rachels website

SHARE:
© Yvette Barnett. All rights reserved.
Blogger Template Made By pipdig